

Petalinux hardware
Template location: Git repository
Xilinx Vivado template files (Verilog, block design, constraints) for the HDROB Zynq board.
Checkout the files to a local directory, then open Vivado and type in the Tcl console:
1 2 | cd /path/to/your/hdrob-petalinux-hw source build.tcl |
This creates a basic hardware module. A Verilog top module is created, including all I/O connections to the various connectors, defined as signal inputs. A created constraint file locks these signals to their correct physical locations and attaches different properties to the nets (IOSTANDARD, DIFF_TERM).
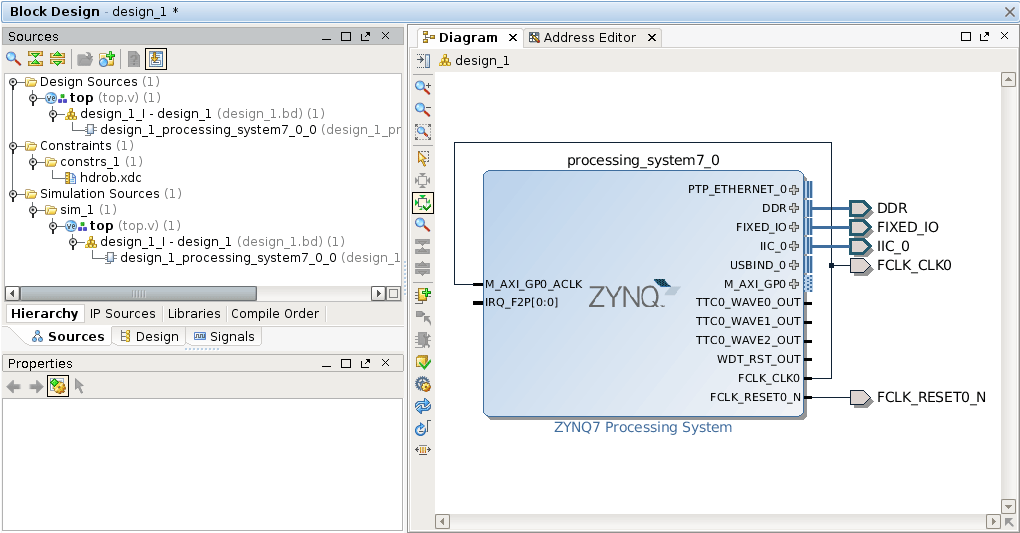
The CPU cores and all associated peripherals are configured by instantiation of a processing system core in the created block design.
Petalinux software
Template location: Git repository
Xilinx Petalinux project template for the HDROB Zynq board.
Checkout the files to a local directory, then type in a console with sourced Petalinux settings:
1 2 | petalinux-config --get-hw-description=/path/to/your/hdrob-petalinux-hw/hdrob-petalinux-hw.sdk
petalinux-build
|
See the build process page for details.
To access the Petalinux system, either use the serial console or connect via SSH.
Default settings
- Boot source: QSPI
- UART baud rate: 115200 bps
- UART configuration: No hardware/software flow control, 8 data bits, no parity bit, 1 stop bit
- IP address: 192.168.0.2
- IP netmask: 255.255.255.0
- IP default router: 192.168.0.1
- IP address for TFTP server: 192.168.0.1
- root user password: root
Switching between QSPI and SD card boot
Run petalinux-config, then navigate to Subsystem AUTO Hardware Settings -> [*] Advanced bootable image storage Settings. Now, set image storage media for the following entries to primary sd for SD card or primary flash for QSPI boot:
- boot image settings
- kernel image settings
- dtb image settings (if the in-kernel device tree is not used)
Then go back to the main screen and select Image Packaging Configuration -> Root filesystem type. Select SD card for SD card or JFFS2 for QSPI boot. When switching back to JFFS2, verify that the erase block size does match the value specified in the QSPI boot recipe.